

Fetch
Fetch is a digitally assisted staging and fulfillment system with custom hardware and software designed to boost the reliability and speed of the retail shopping workflow.
Fetch is still under development, and some parts are still being prepared for open-source release. This project is not ready for production use. Please report any issues to the Codeberg repo.
✨ This project is developed with AI-assistance. Please refer to our AI policy.
The problems
With more development, this kind of system can technically solve even more problems, but these are the ones that led to the project's creation.
Slow, unreliable scan-staging
The traditional workflow requires two scans, one to determine the target stack (if one is available) where the tote needs to be placed, and another scan at the location to perform the stage itself, informing the back-end system of where that tote can be found.
Each scan takes time, waiting briefly for the device to update with the target location, and again when the stage action is performed. It can also be unreliable when workers accidentally stage totes to the wrong stacks, or even fail to perform the stage-scan altogether, slowing the worker downstream who has to hunt it down.
Sticker labels are waste time and material
Sticker-based labels come with numerous problems:
- Printing sticker labels takes time, and workers have to wait in line when there aren't enough thermal printers.
- Workers have to stop and put new label rolls into the printer every so often, usually several times throughout the day.
- Once printed, workers have to manually apply the stickers to a set of totes, taking even more time.
- Stickers can fall off, their totes losing their identities.
- Over time, sticker residue builds up on the totes which requires additional cleaning.
- Retailers print countless single-use sticker labels, and they all get thrown away due to their non-recyclable adhesive backing.
The solution: Digital hardware
Fetch introduces a hardware system designed for assisted staging.
Fetch totes
The first hardware component is the Fetch tote.
The current design and renders are for the development prototype, which uses an off-the-shelf ESP32-C3 SuperMini and hand-wired power splices between the MCU and the stack connectors. A production version would replace this with a custom PCB that integrates the power distribution and provides direct connection points for the connector cables and display, which should allow for a smaller electronics housing. The custom PCB has not been designed yet.
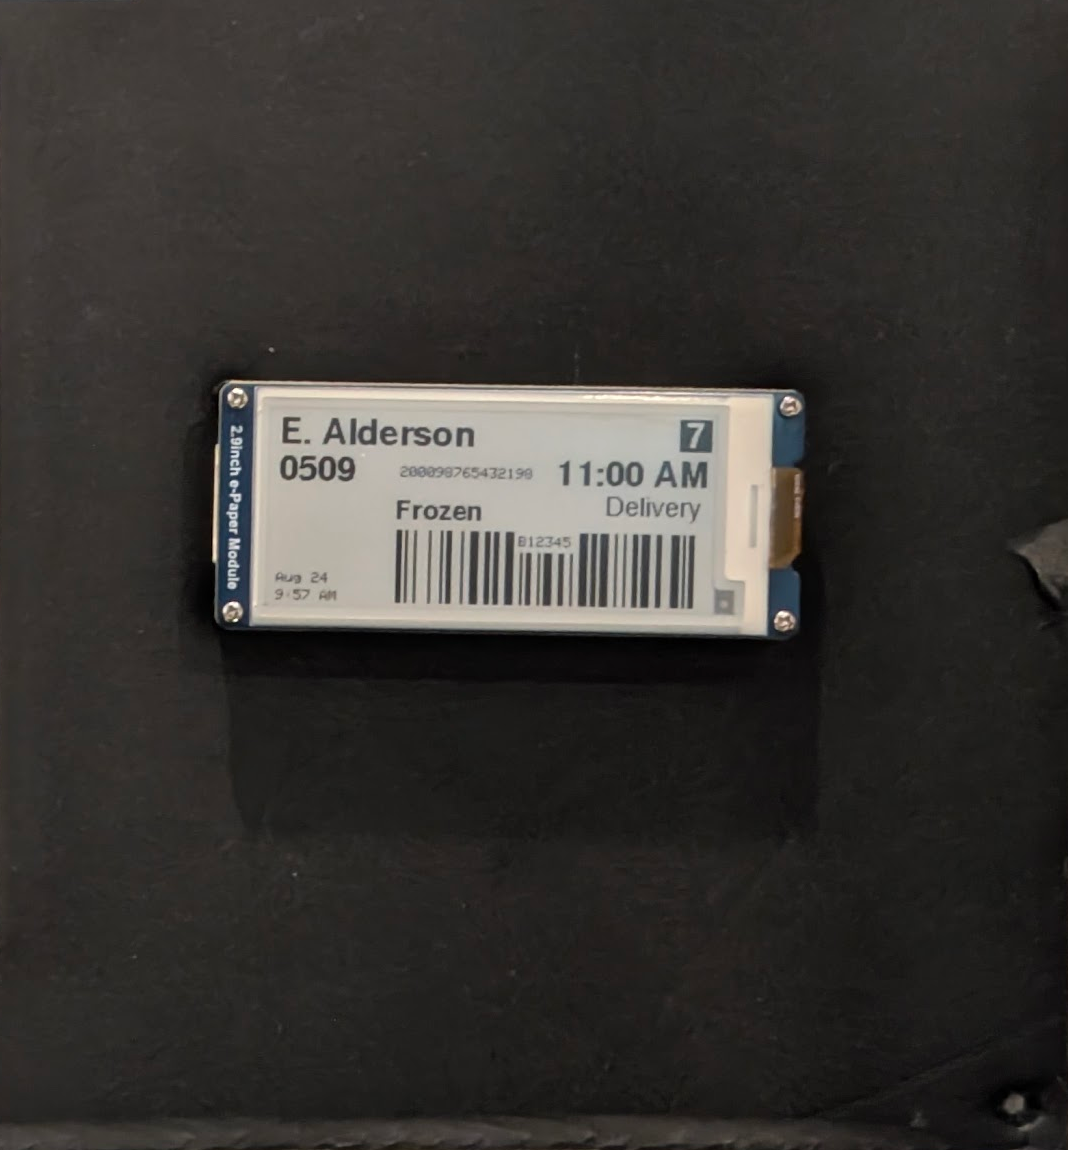
Each Fetch tote contains a microcontroller (currently an ESP32-C3 SuperMini) that receives tote data and shows it on a 2.9" e-paper label. The tote also passes its ID down through the stack of totes beneath it to a digital platform, which reports its stack contents to the back-end system. There is no scan-staging involved since placing the tote on the stack is the stage action, with no chance to forget it or scan it into the wrong stack.
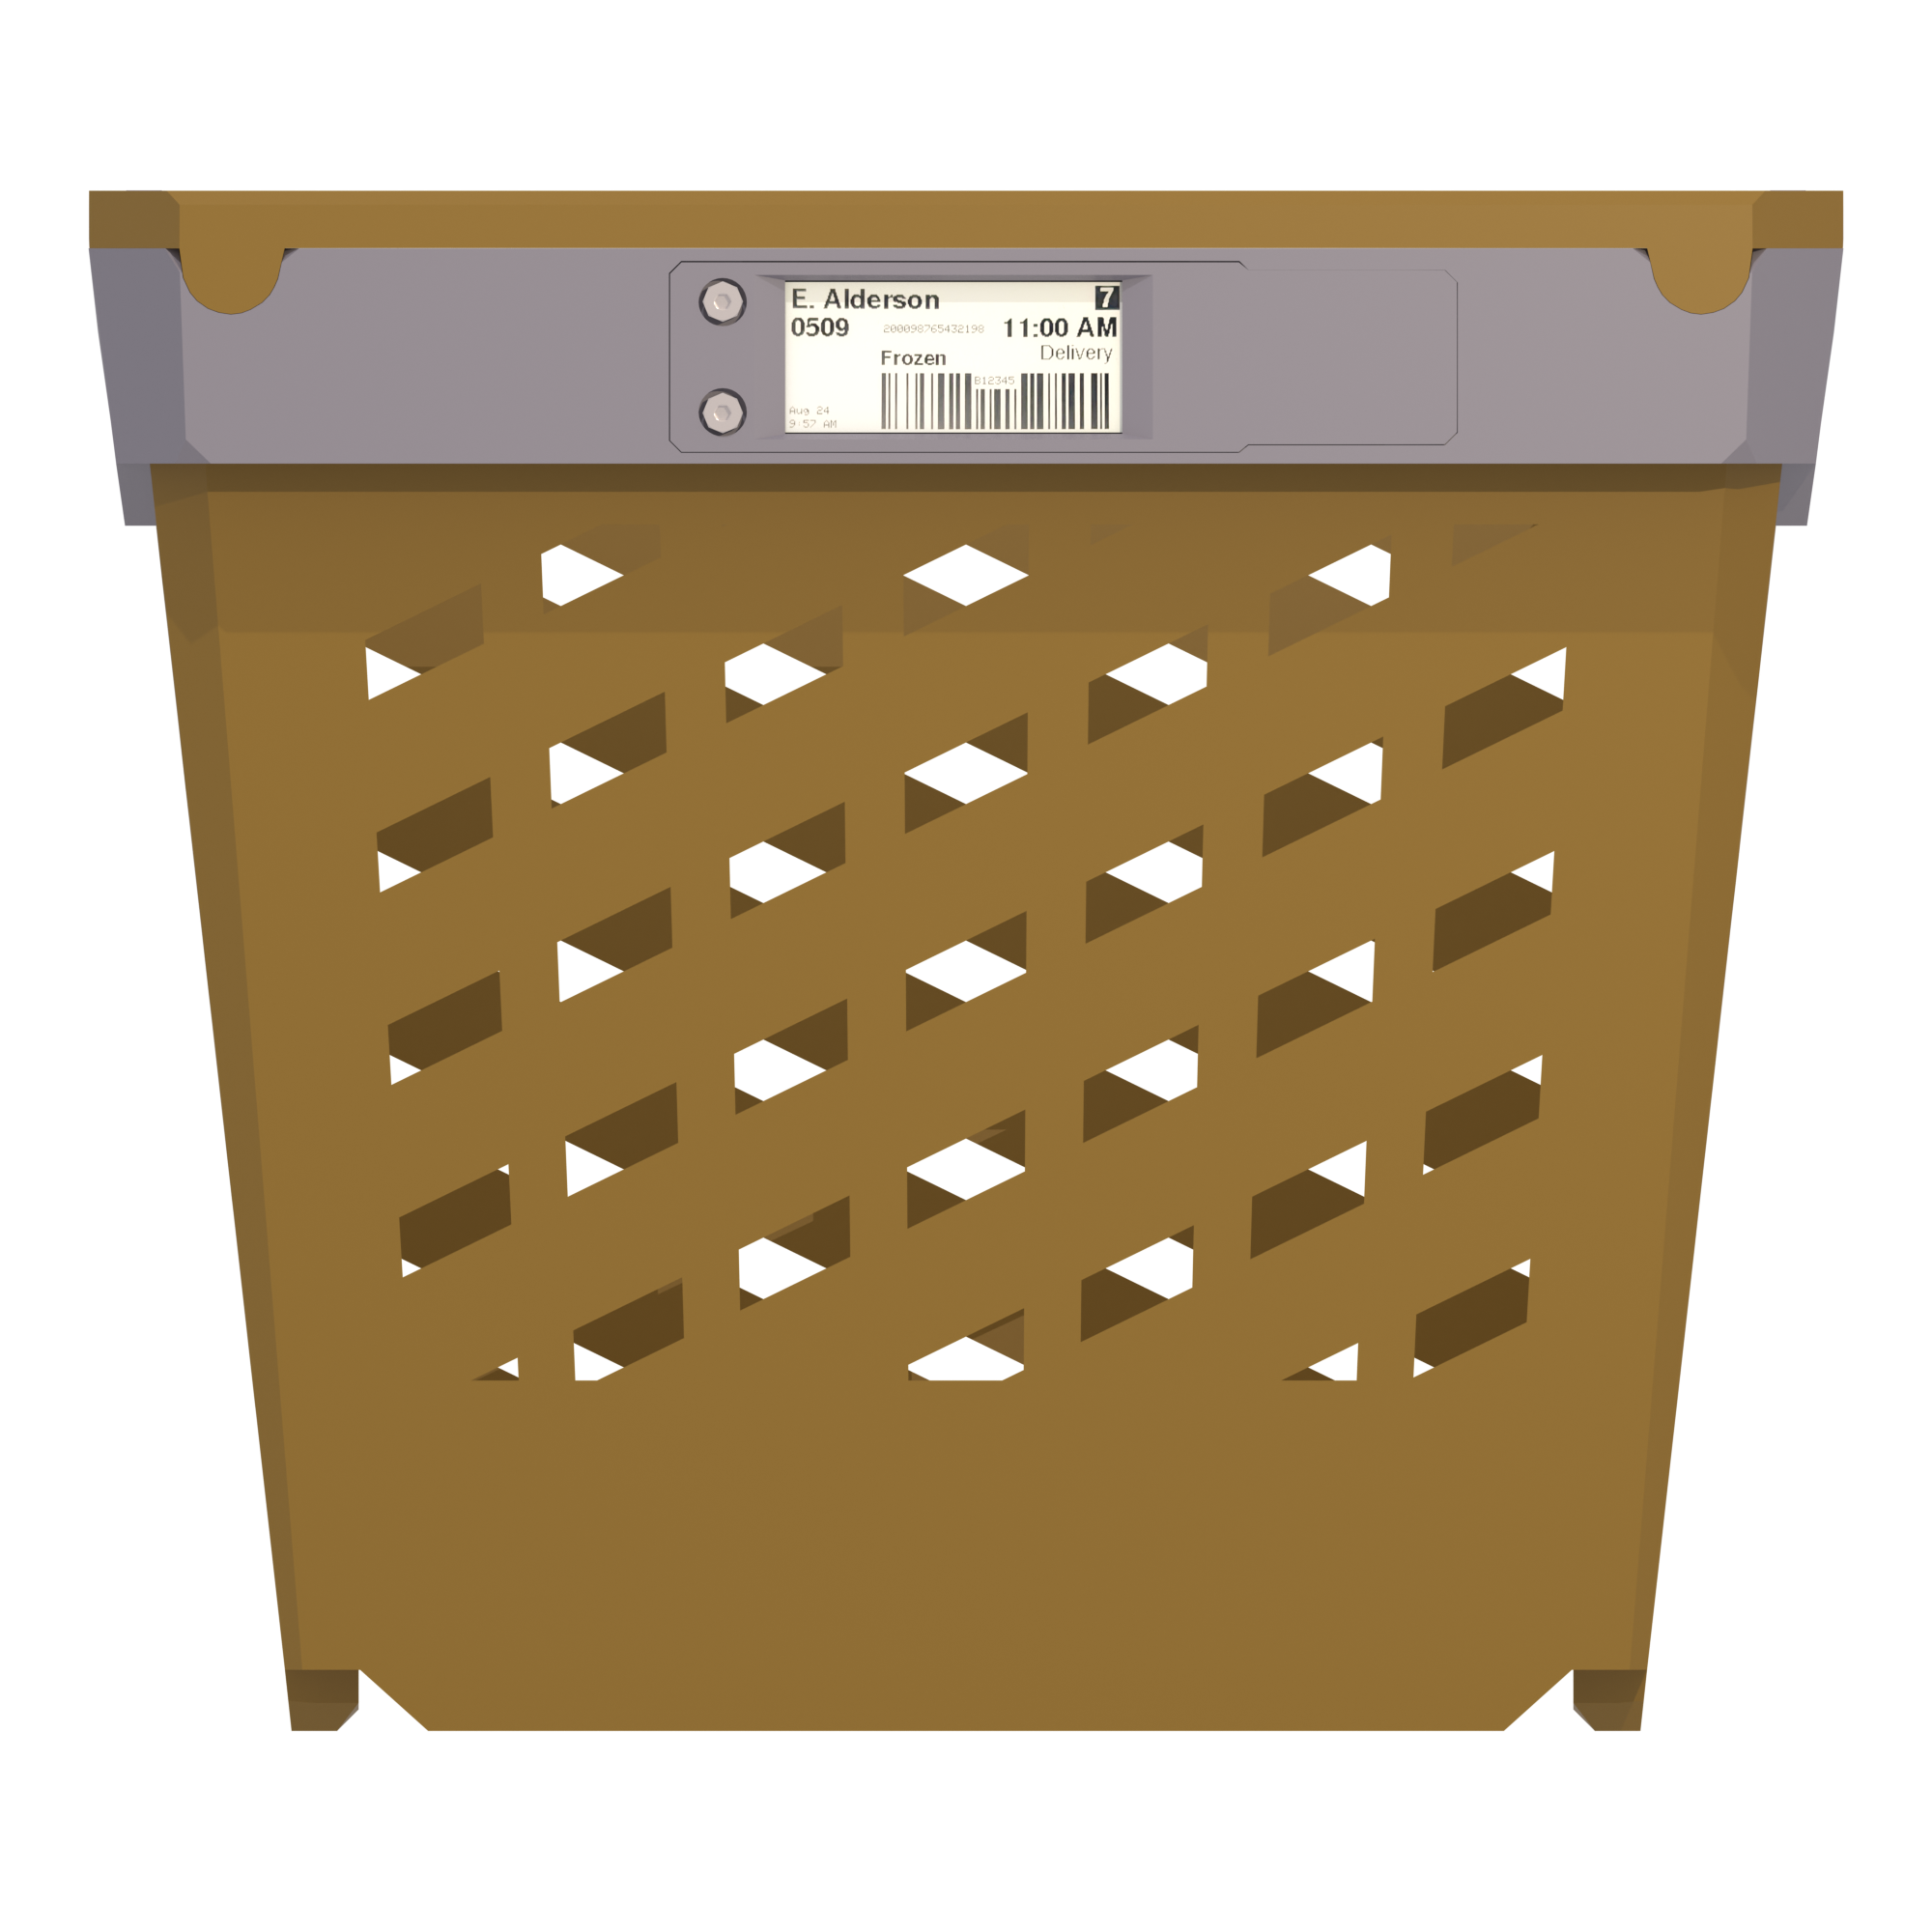
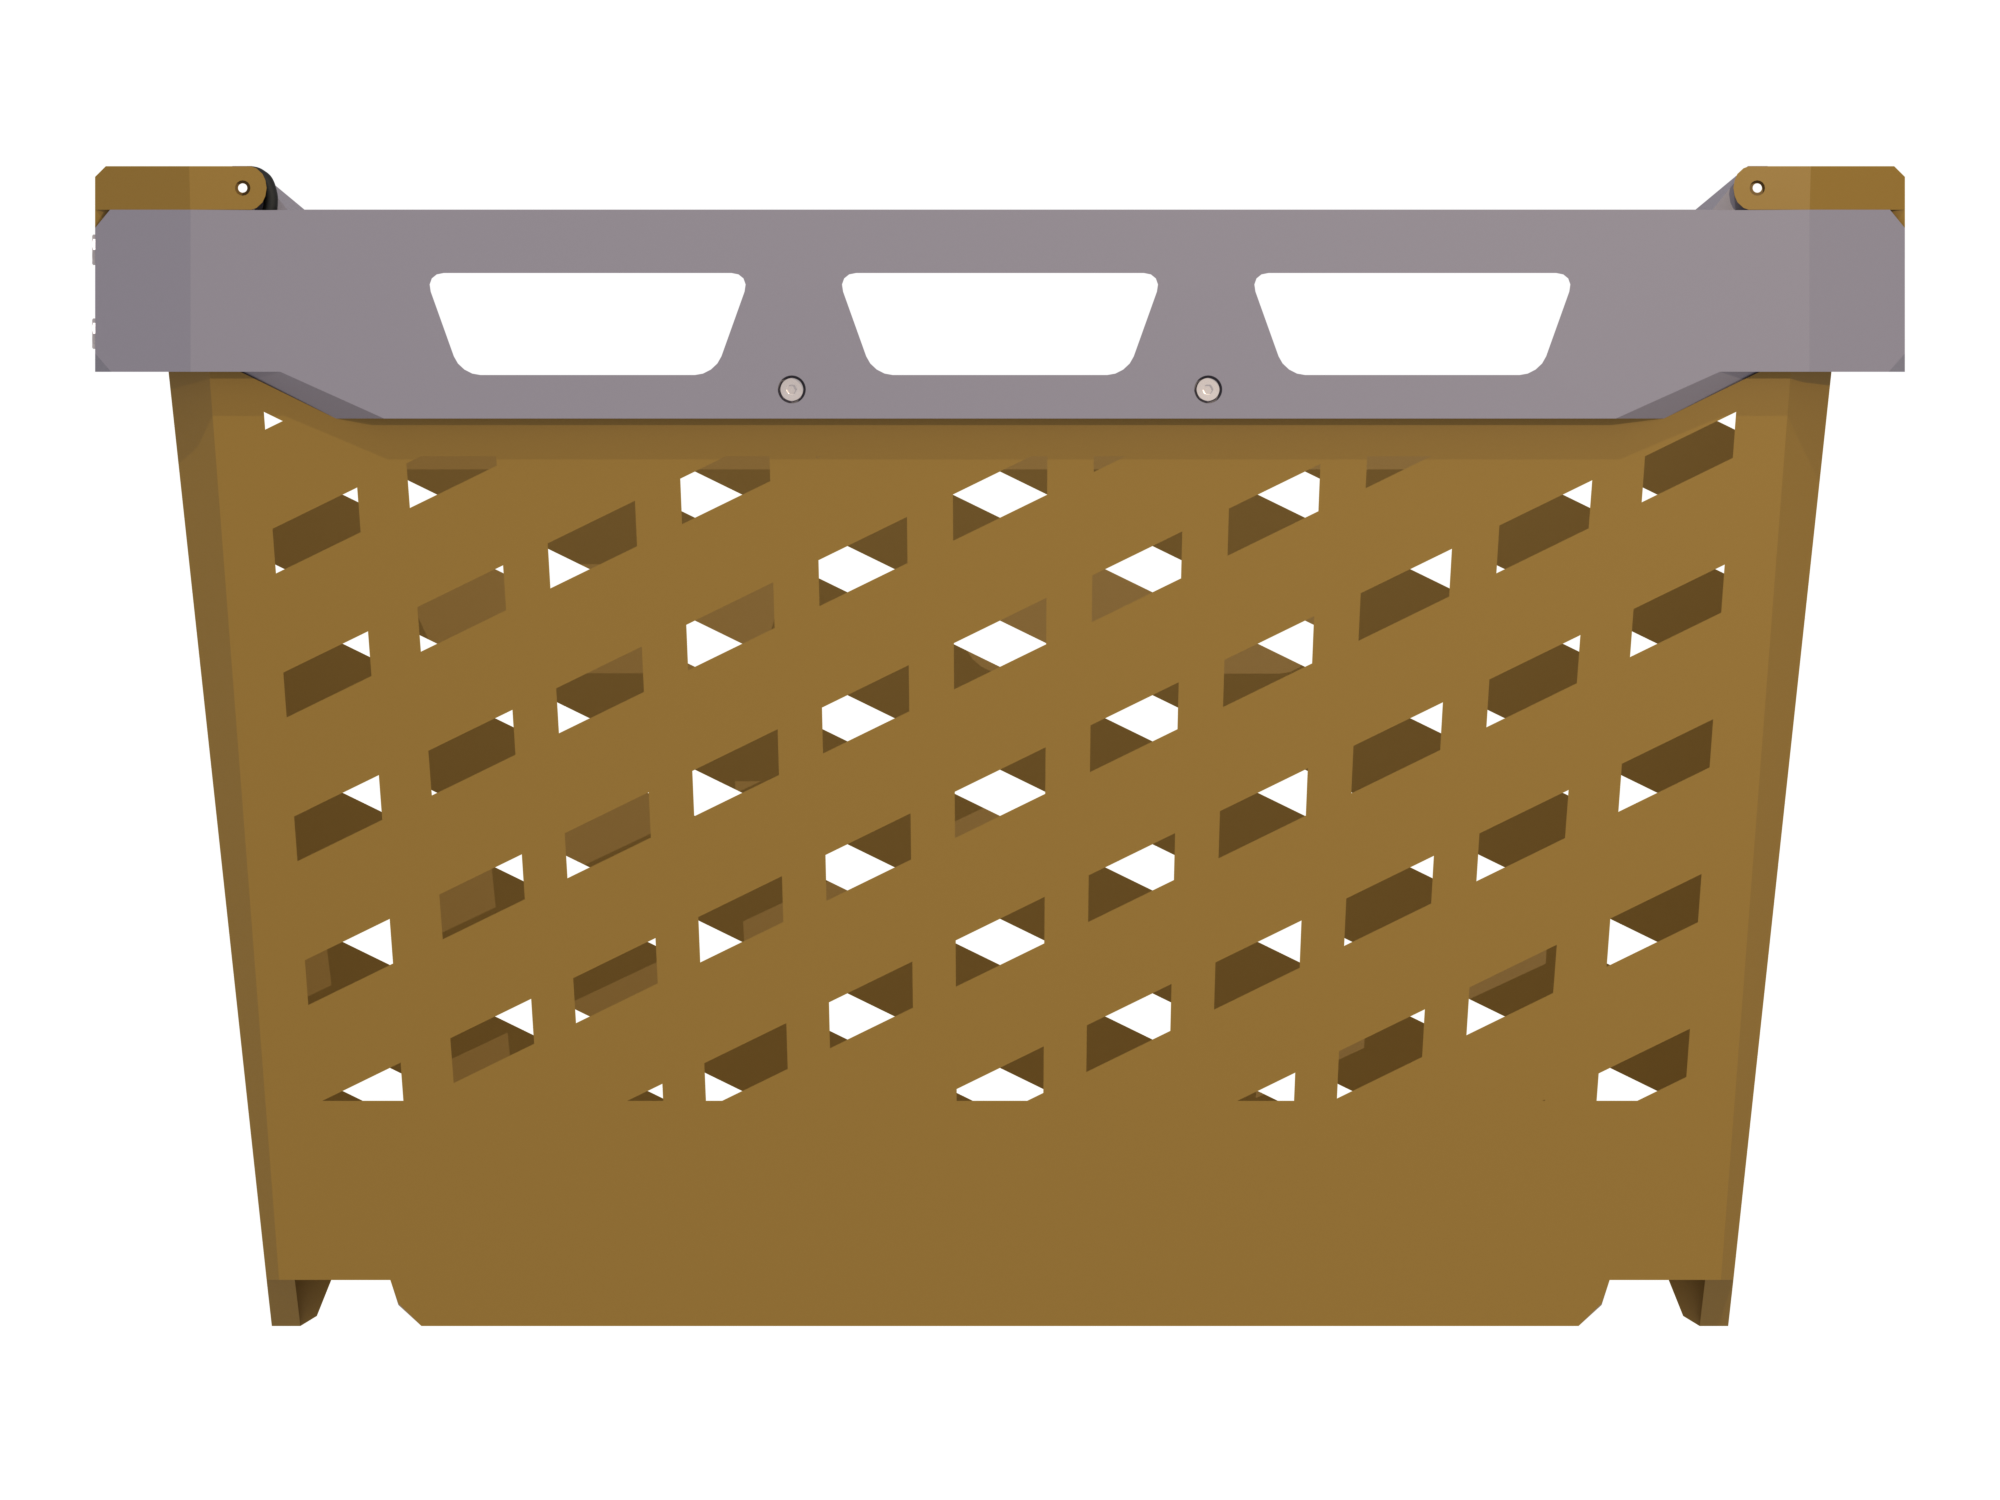
Connecting stacked totes
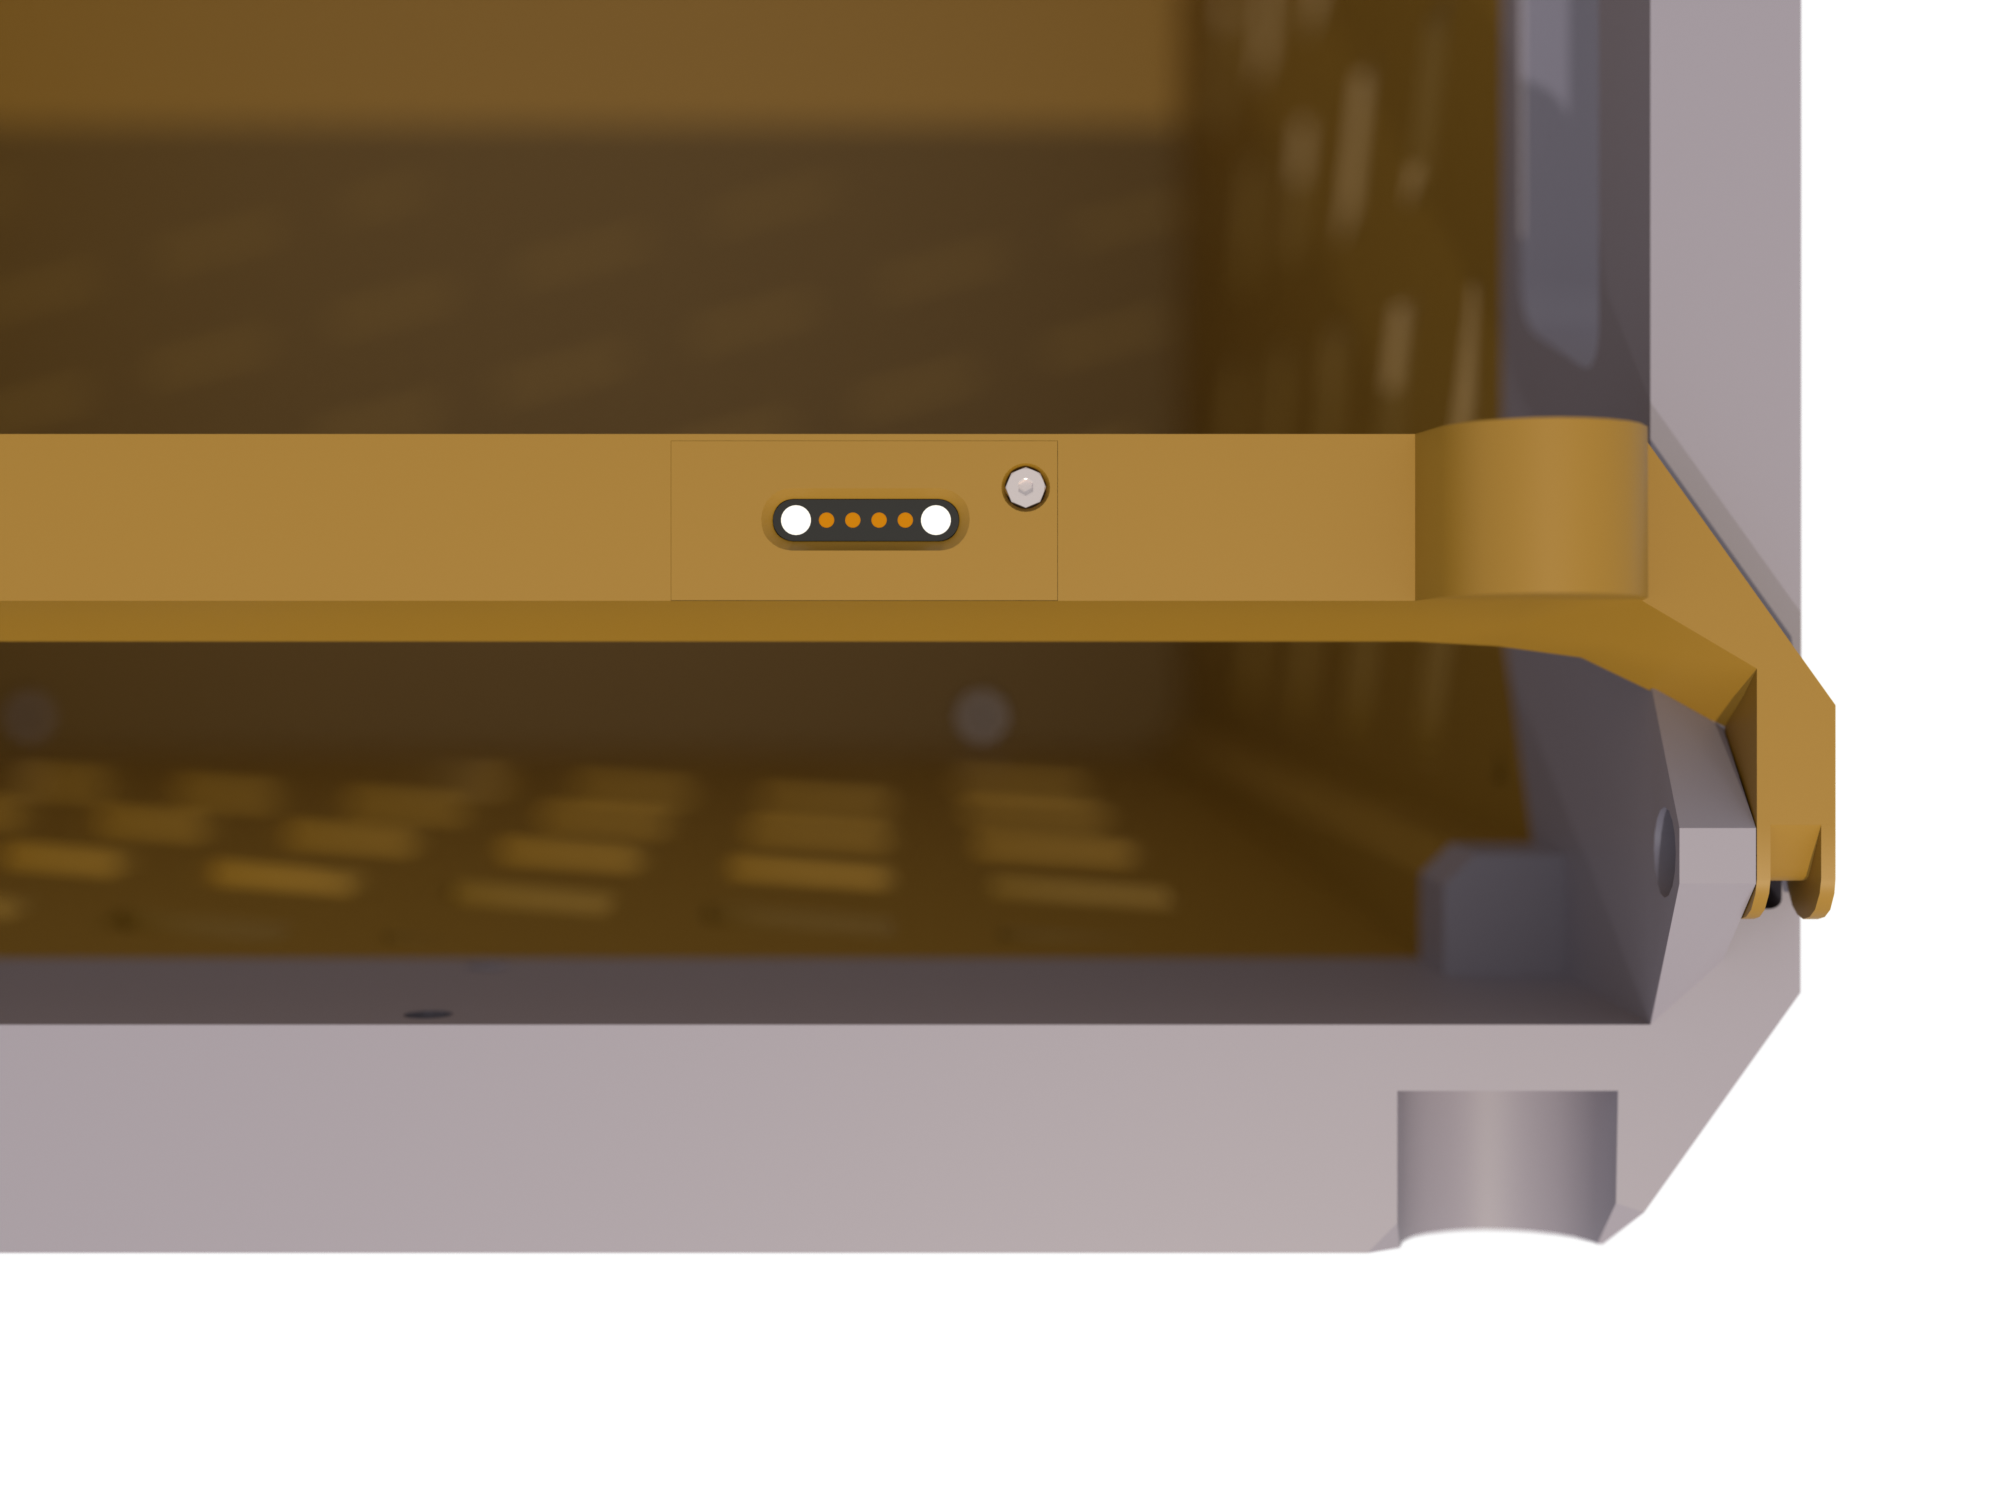
Totes connect via 4-pin (5V, GND, and two serial) magnetic pogo connectors fixed to the top and bottom of each tote, with cables running from the MCU to each connector. The top connector is on the front-side support arm, its cable running through the arm, exiting from a tunnel in the tote's top ridge near the hinge.
The bottom connector sits recessed from the tote feet in the space that the other tote's support arm fits into.
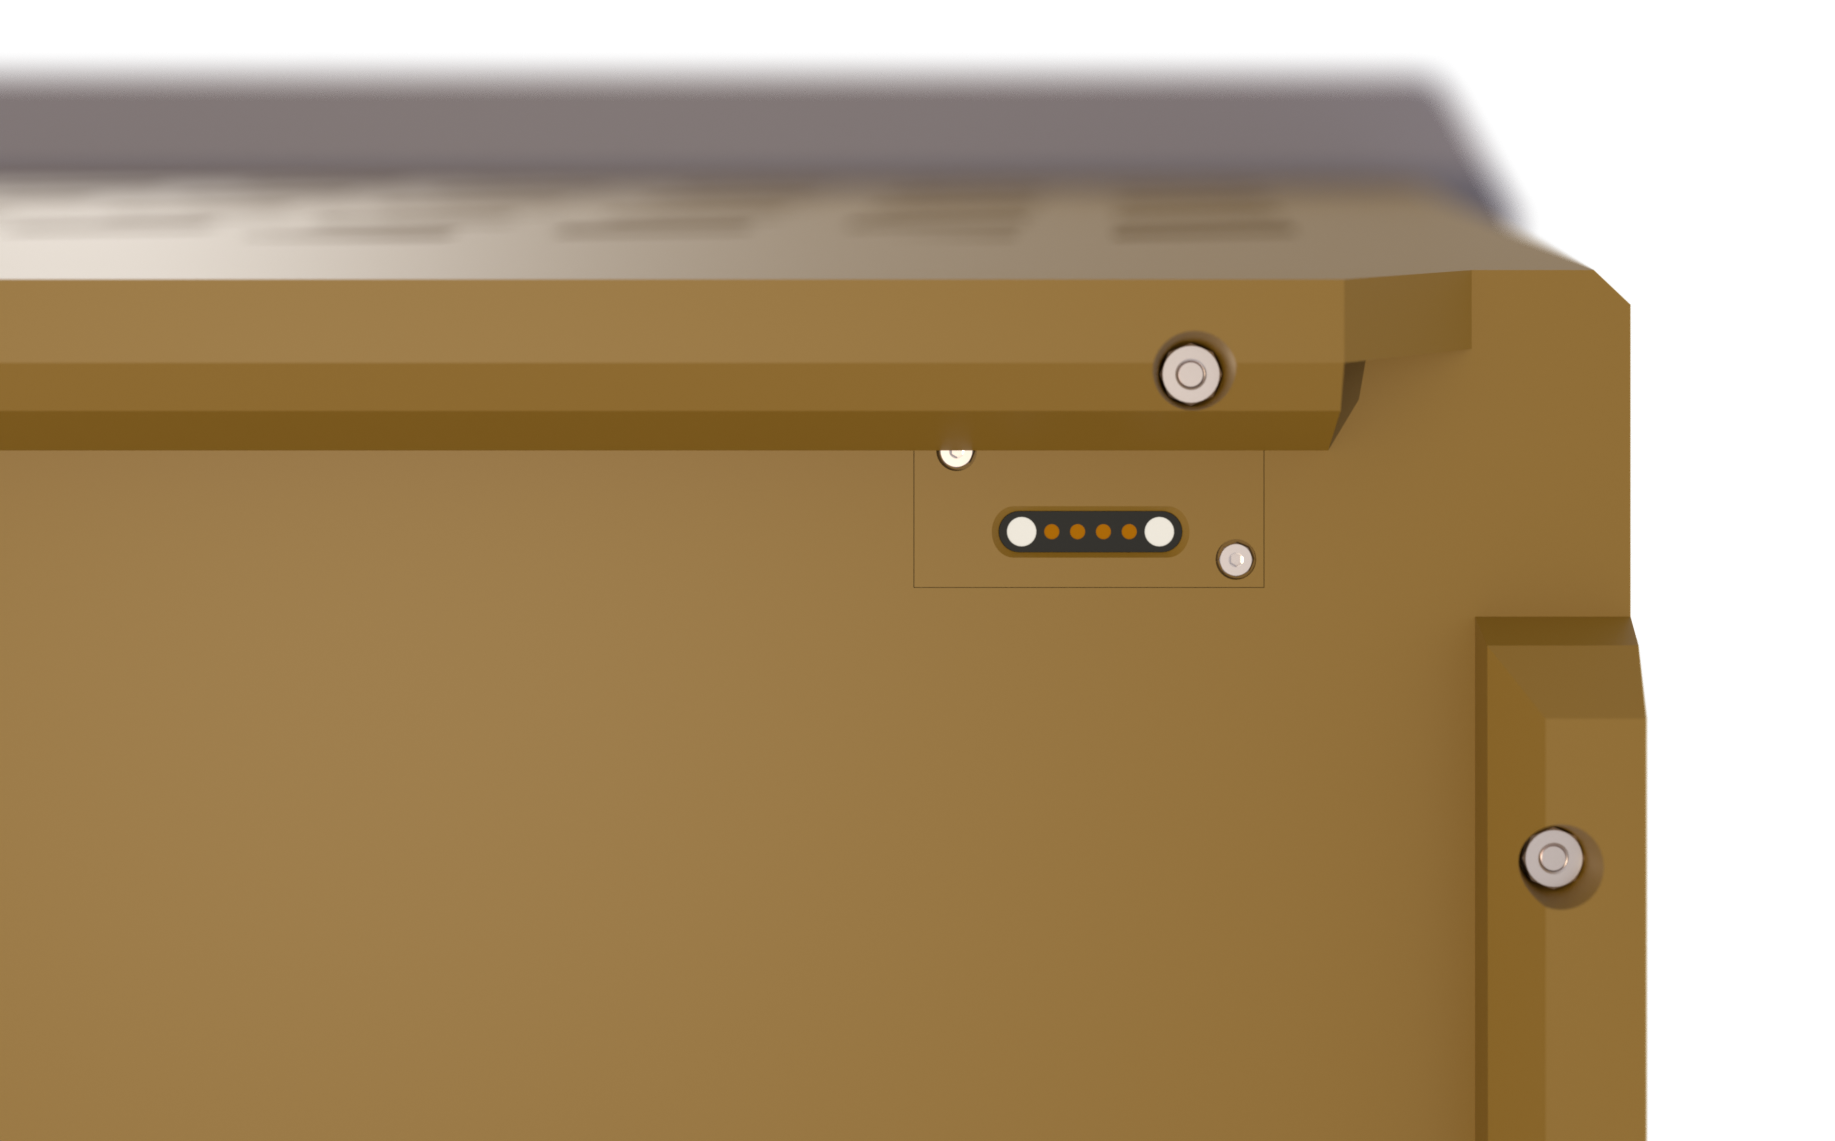
Totes are battery-free
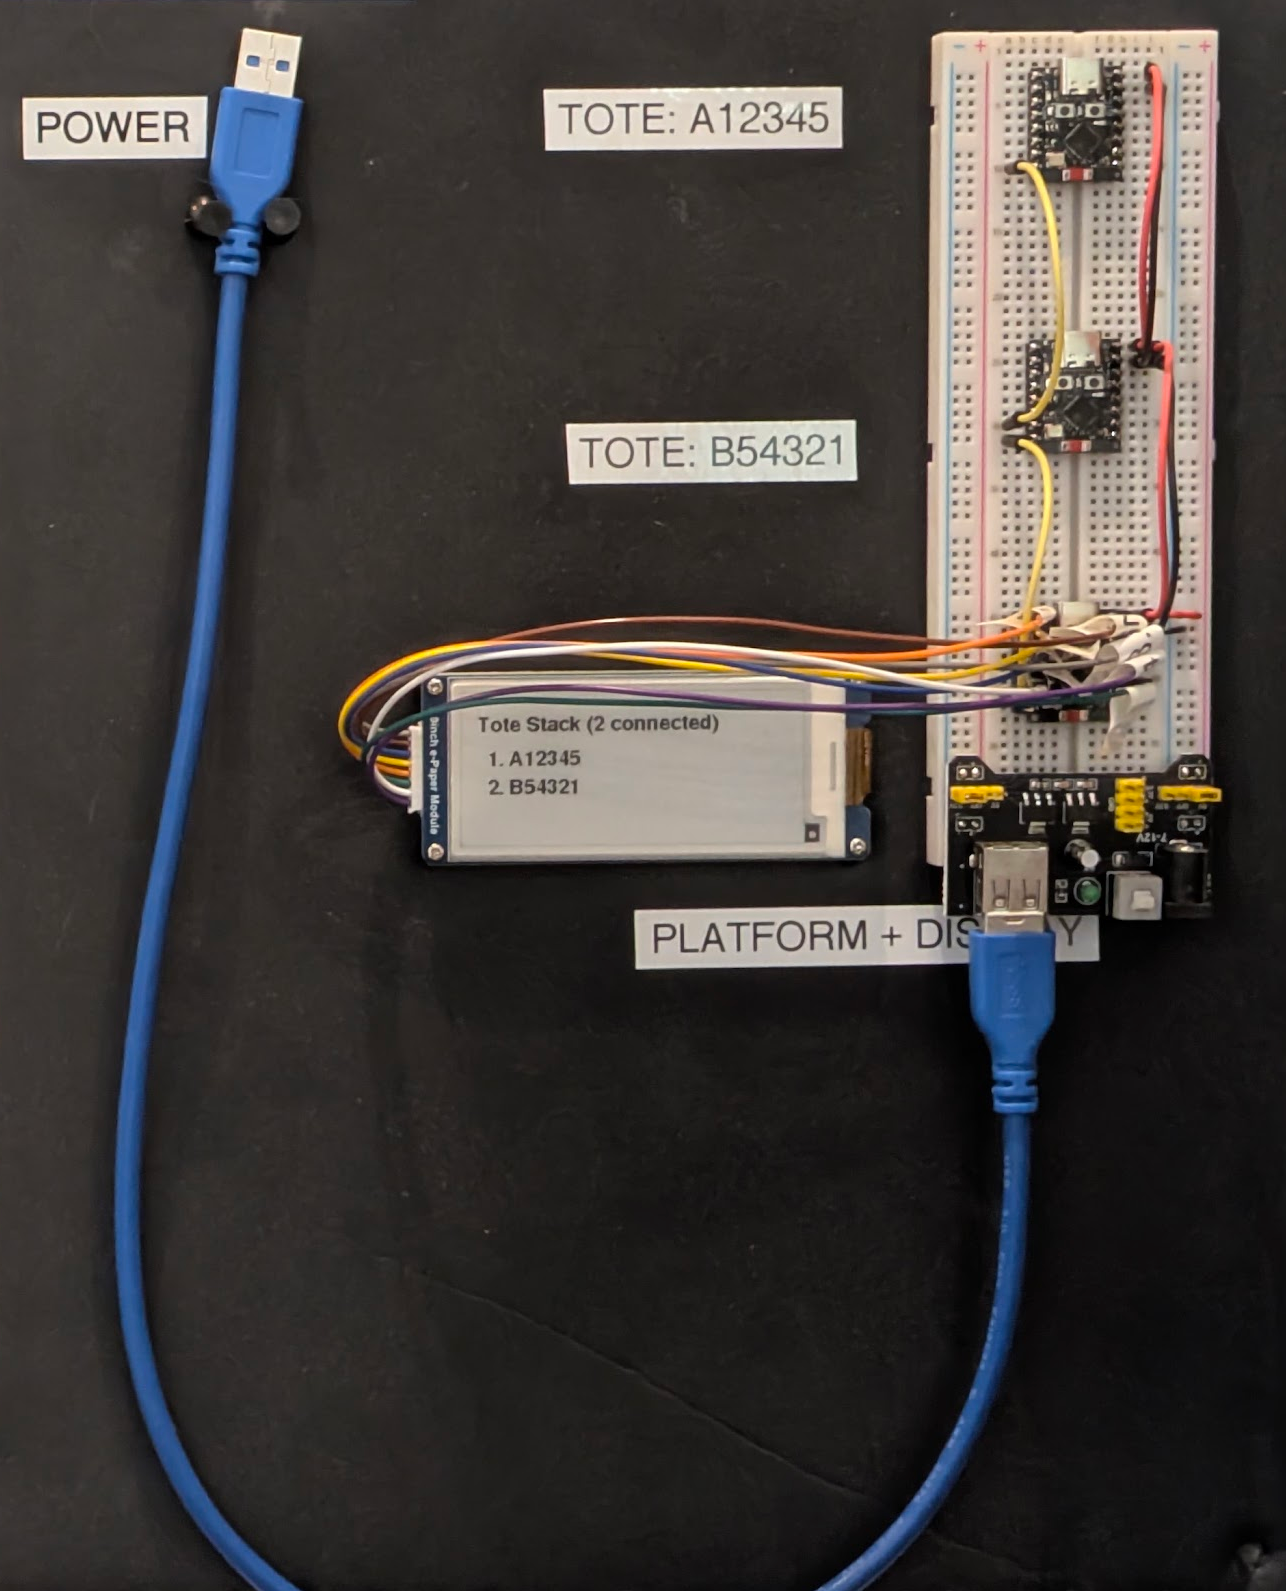
Power is shared through the stack with each tote receiving its power from the tote below it, except for the first tote which gets its power from the stationary platform. When a tote is placed on the stack, it powers on and reports its ID down. The e-paper label holds its image without power, so a tote removed from the stack is still labeled.
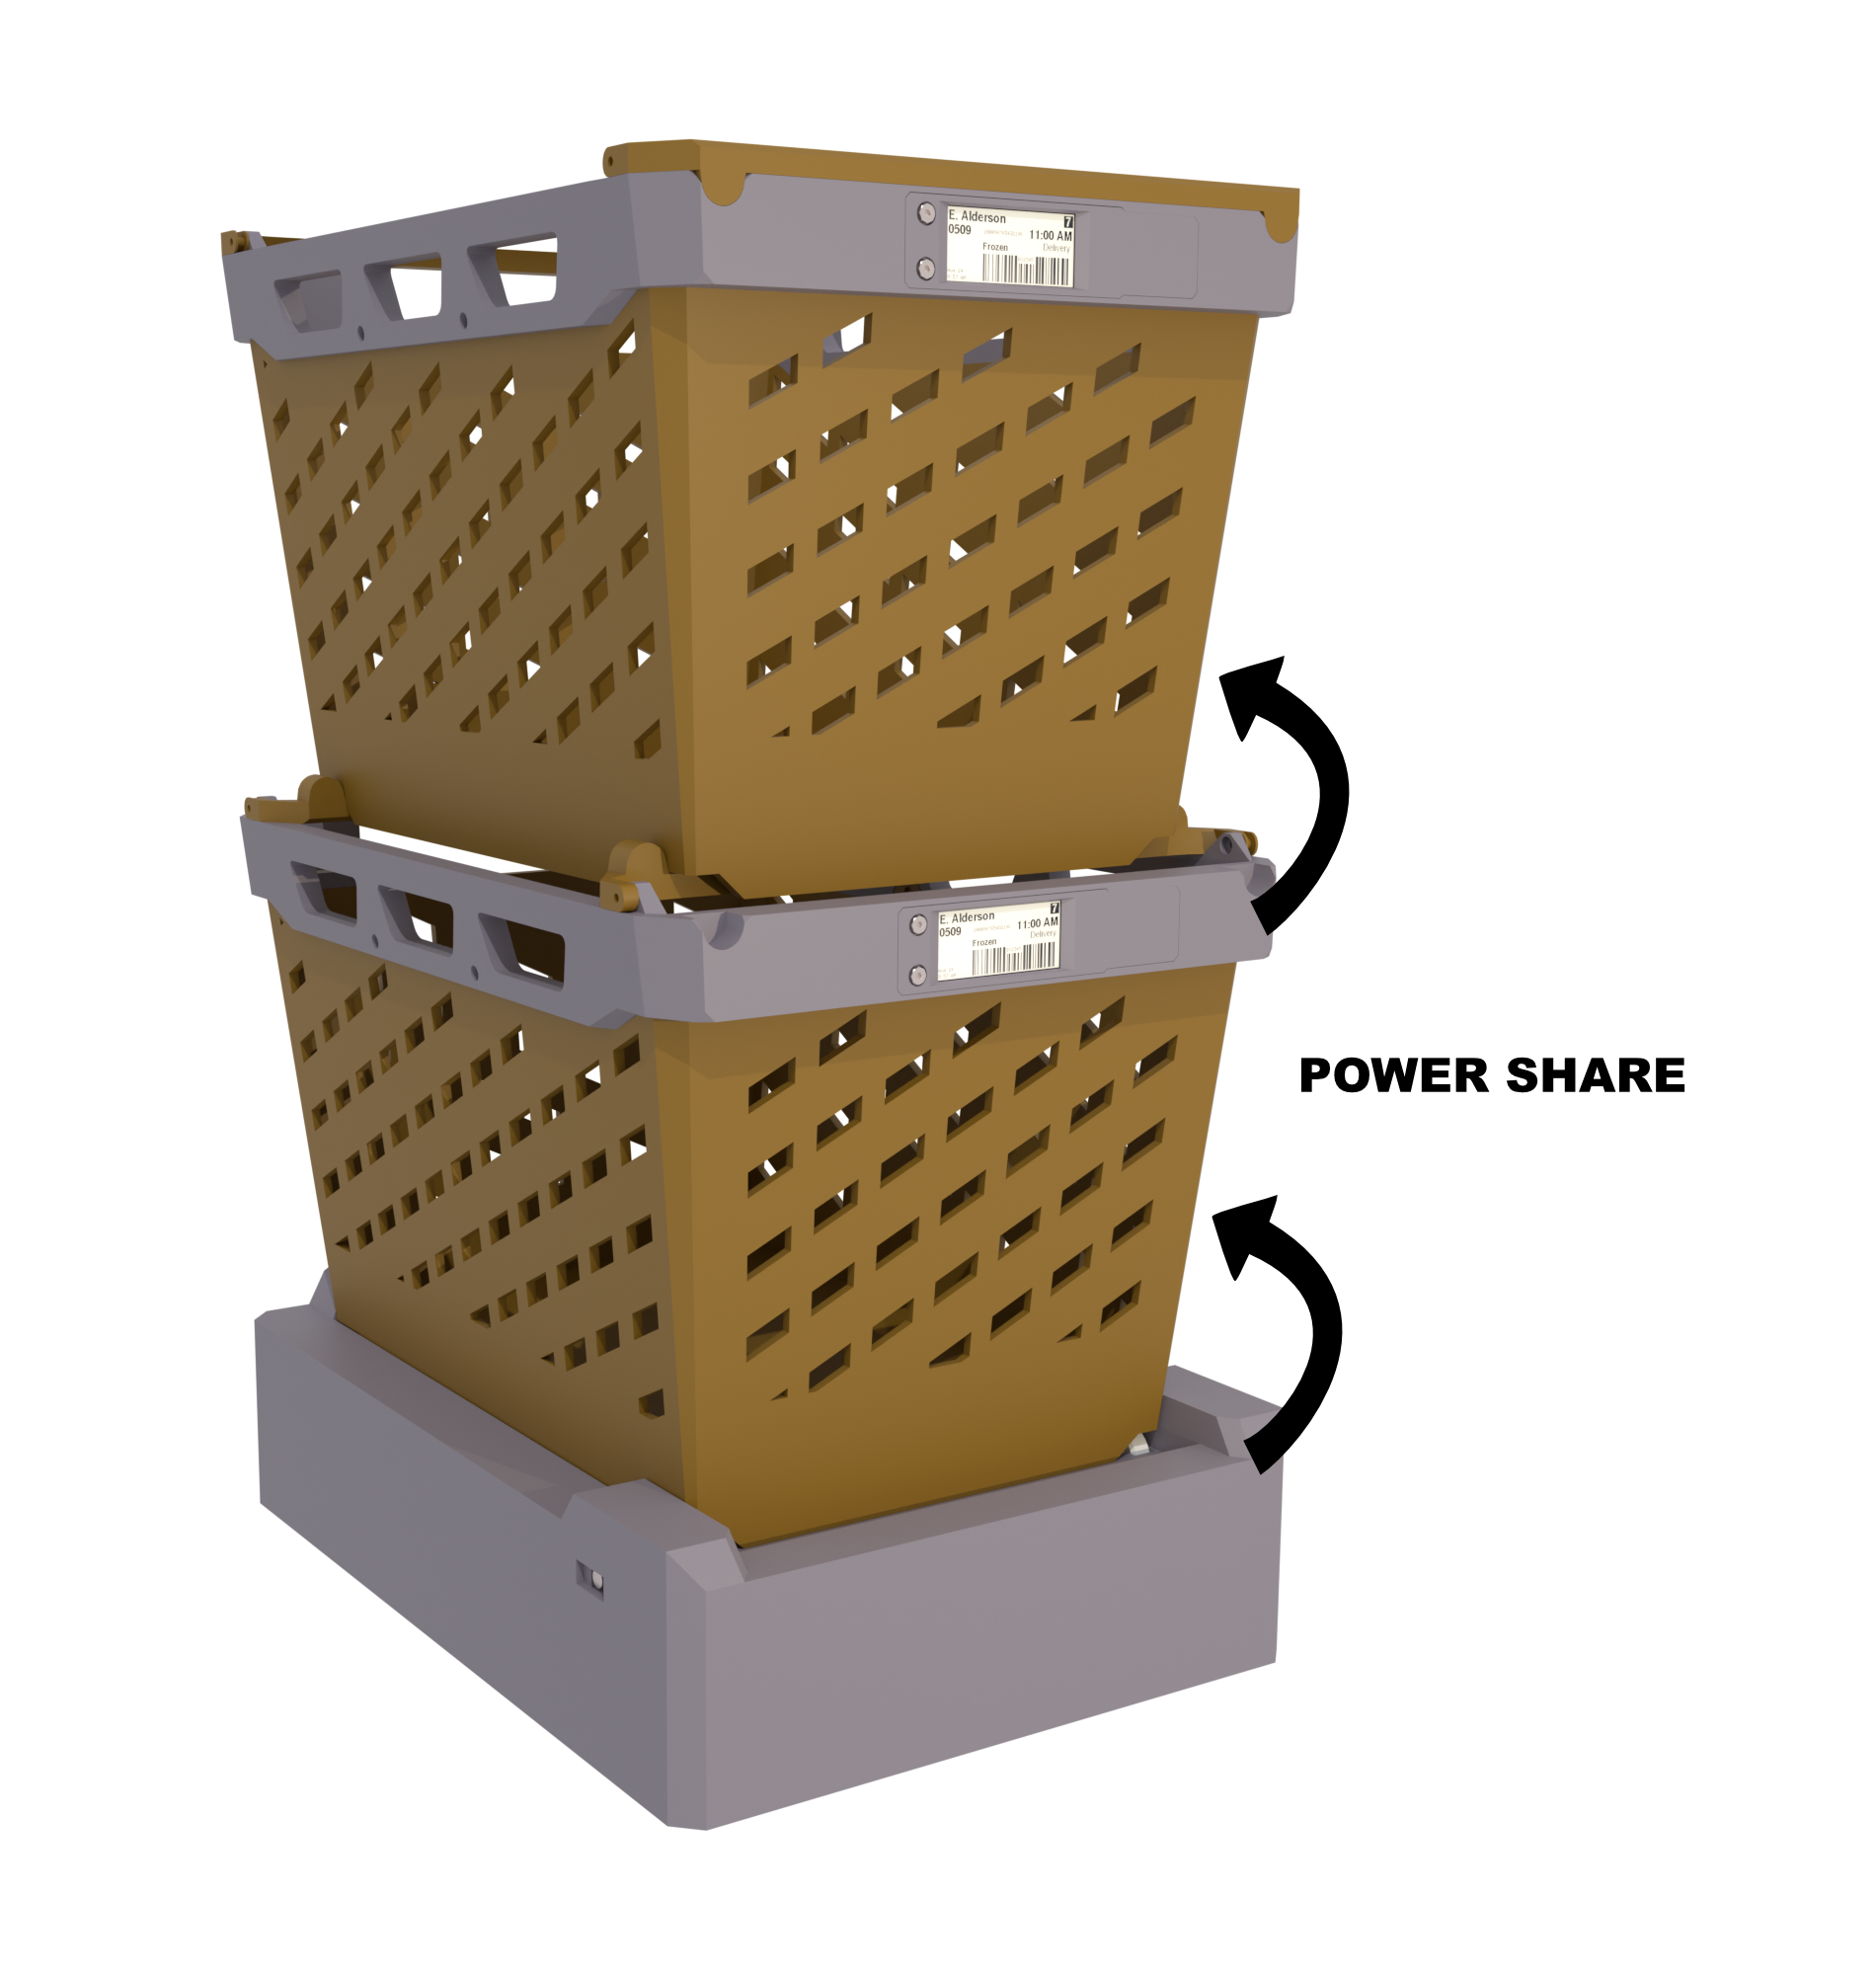
The platform under the stack in this render is a work-in-progress.
Tote tests & prototypes
The first test was getting the e-paper label working and laying out the tote information (using fake data).
Following that was the breadboard testing which tested power sharing and communication between two tote MCUs and a platform MCU.
EBar prototypes
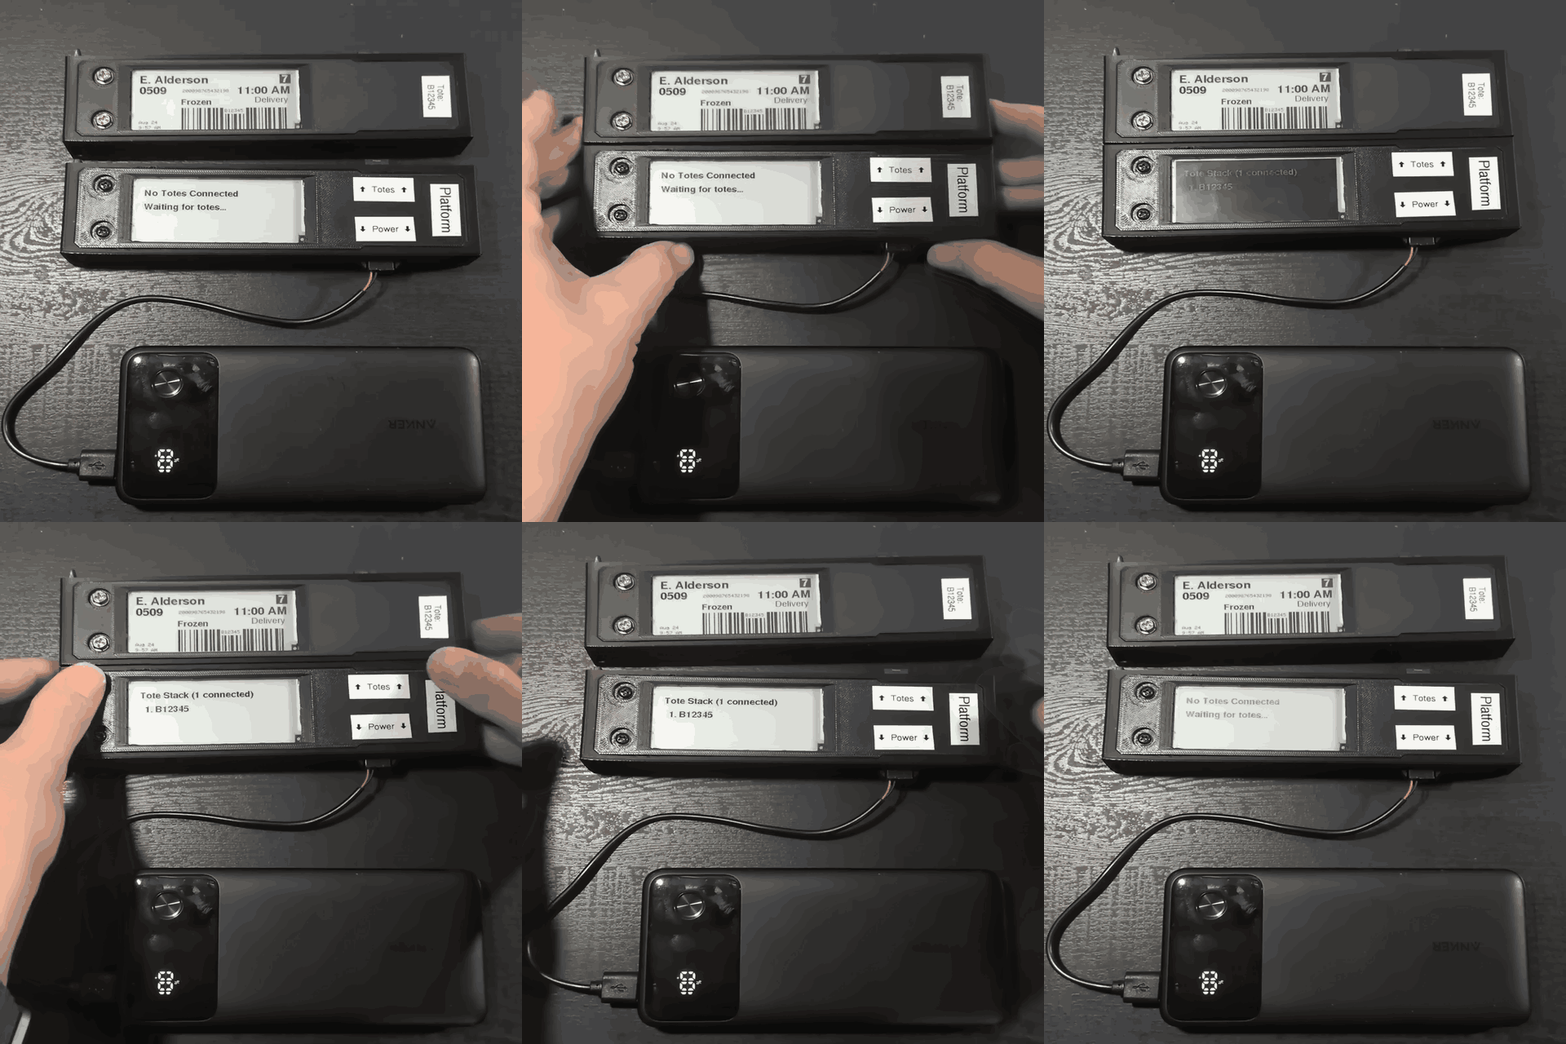
3D-printing and assembling full totes before the electronics housing was settled would have been difficult since iterations can't be developed rapidly. It also would have been very wasteful. To solve that, the main housing section was isolated and fit with special connectors that allowed for the same stacking connectability. The isolated sections were called EBars, and they enabled the rapid iteration that was desired.
An EBar could represent either a tote or a platform, the only difference being the firmware uploaded and the fact that the platform EBar needed a power source.
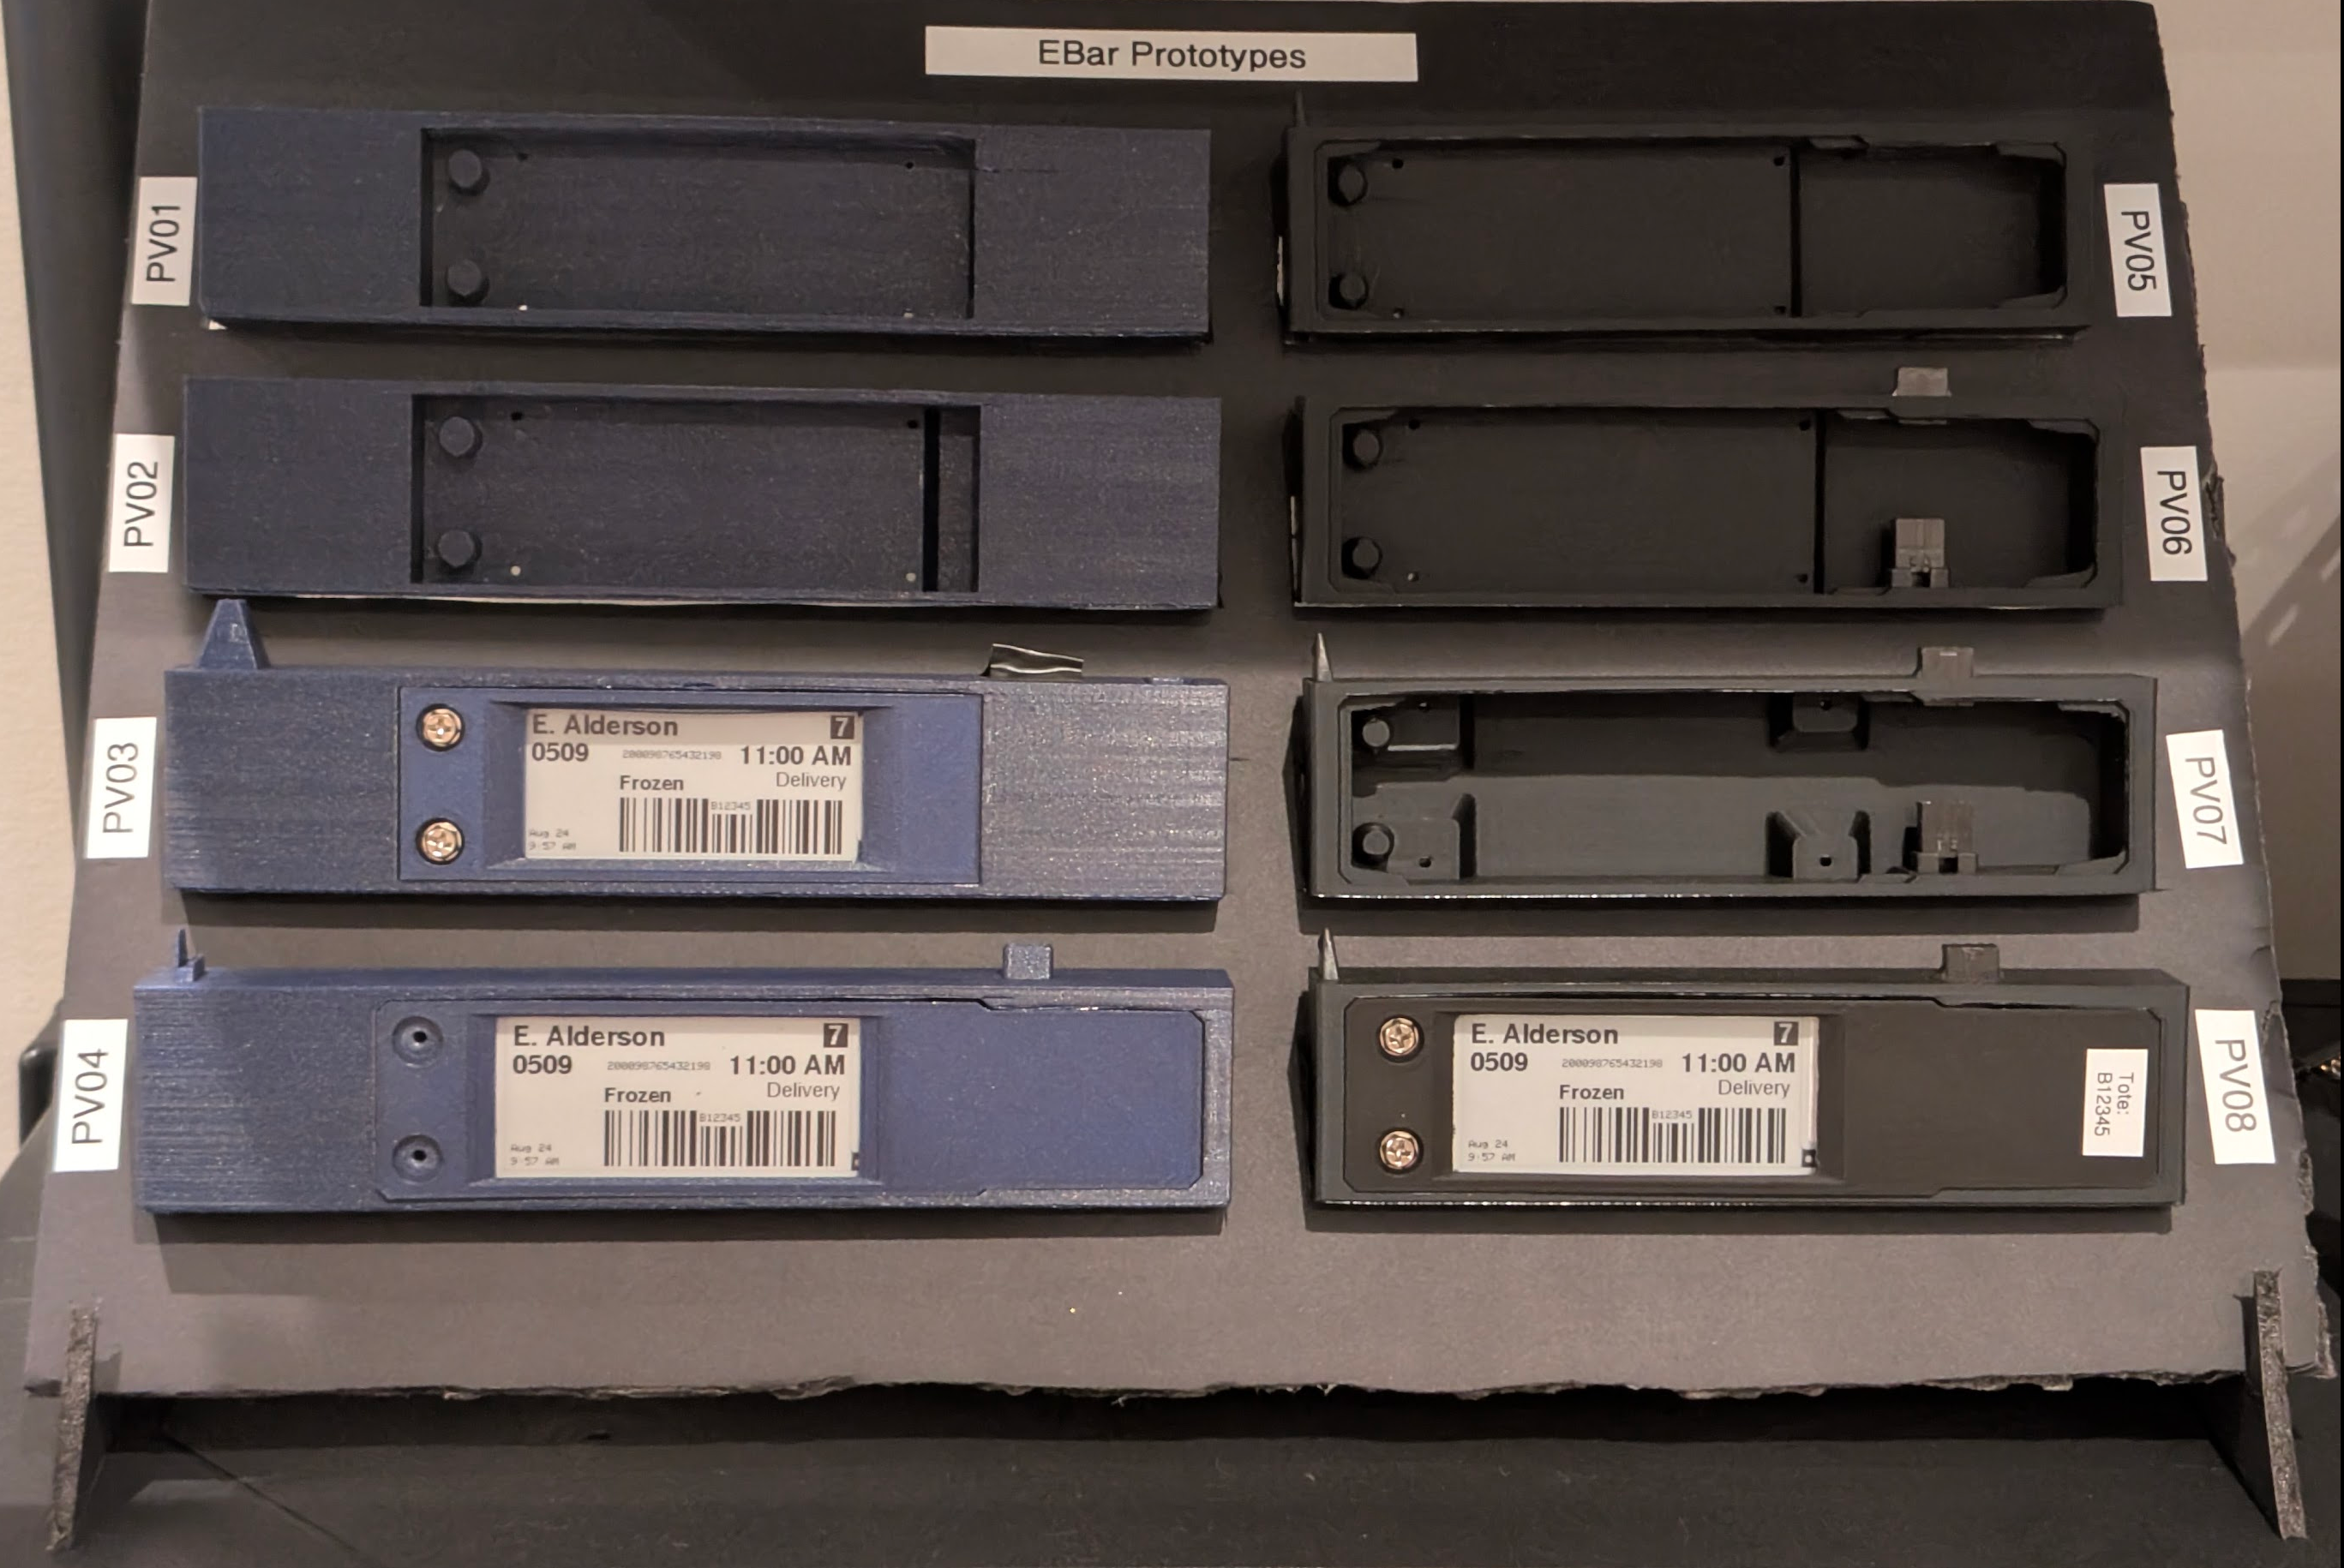
The 8th iteration was the one that was sound, so a second one was built, and the same test from the breadboard example ran successfully.
Full-scale tote prototypes
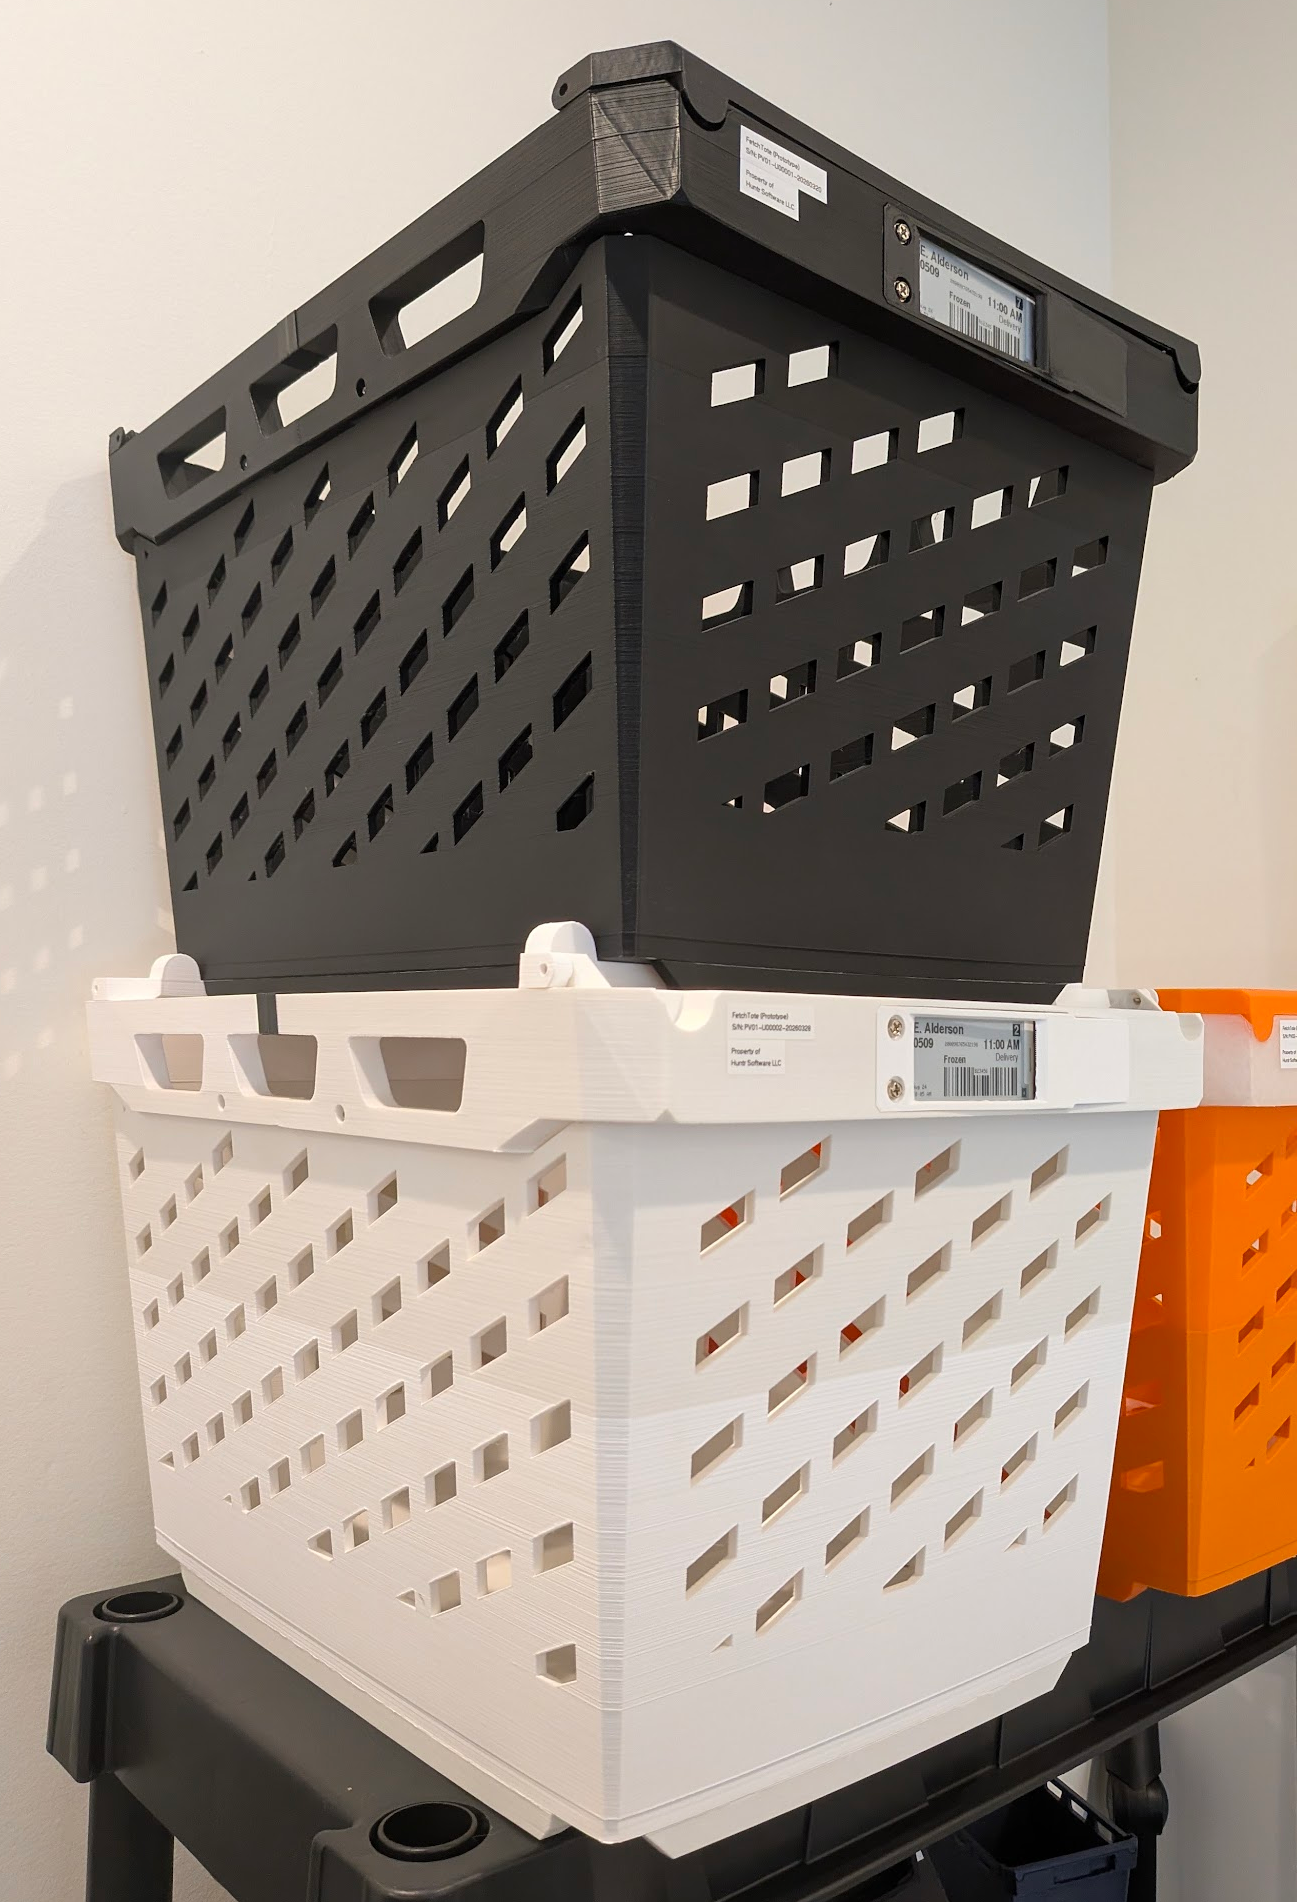
Following the EBar prototypes, two full-scale tote prototypes were printed, assembled, and confirmed working with the same test firmware.
What's next
The following still needs to be planned, prototyped, and tested:
- The tote's custom PCB
- Two-way stack messaging
- The back-end server & database
- Digital platforms
- Digital carts
License
Fetch is open-source under multiple licenses.